

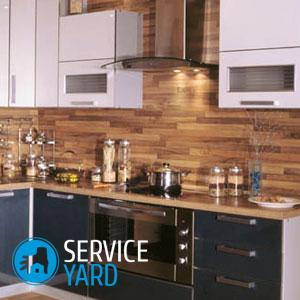
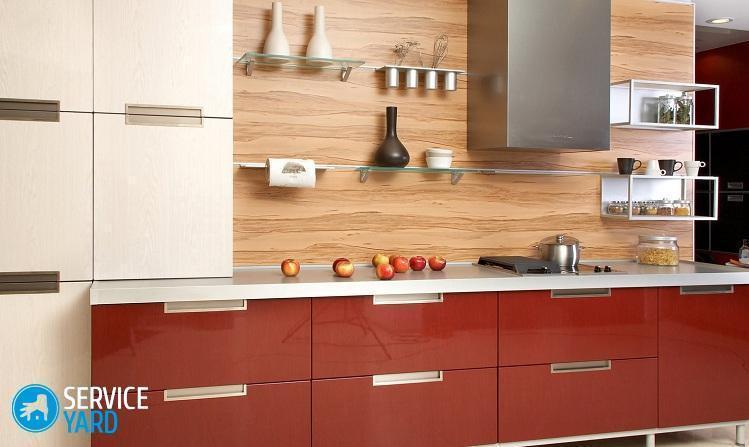
Laminate kitchen apron
Using a laminate to cover the floor does not surprise anyone anymore; it has firmly entered our everyday life and has become very popular. But few people know that this material is also successfully used on the walls. An apron for a kitchen made of laminate is not only a beautiful option, but also practical. It has many advantages, including the possibility of self-assembly. In this article, we will talk about the prospects of using this material to finish the working area in the kitchen.
to contents ↑Laminate kitchen apron. Advantages and disadvantages
One of the most important rooms in the apartment is the kitchen. Finishing the apron with laminate is a very original and stylish idea, however, before deciding to bring it to life, you should carefully understand whether the laminate wall is convenient and practical. Oddly enough it sounds, but a large number of builders consider this material the best option for decorating a kitchen apron. And all because of exposure to intensive use.
Important! As a floor covering, material of wear class 32 is able to maintain an attractive appearance and its qualities up to 10-15 years, what can I say, if the same laminate is on the wall. With high probability, it can be argued that he will serve at least one and a half times longer.
Advantages of the apron in the kitchen from the laminate:
- Easy to care. In order for the wall to be clean again after cooking, it will be enough to wipe it with a damp cloth soaked in soapy water.
- Moisture resistance. Such an advantage is noticeable only in the case of installation of a moisture-resistant laminate.
- Easy styling. Installing a laminate is much easier than the usual tile for all.
- Long term of operation.
- Affordable cost. Given the long term of use, installing such a wall will cost several times less than tiles.
- Huge selection of textures, colors, prices.
Important! The material can imitate any natural structure - stone, wood, granite, tile. This makes it possible to create exclusive design solutions in wall decoration.
- The purity of the material from an environmental point of view. We are talking exclusively about certified material manufactured in accordance with all the rules of technology.
Disadvantages of laminate apron
There are also disadvantages of using similar material as a kitchen apron:
- If you choose a laminate ordinary, non-water resistant, then it will quickly lose its attractive external properties due to moisture, as it will begin to warp. Therefore, it is better to overpay and buy a waterproof laminate or use tile in the area above the sink.
- The material also reacts to the influence of temperature, which cannot be avoided during cooking in the kitchen.
Important! The recommended distance between the electric or gas stove and the laminate is at least 10 cm. Seams, in order to prevent water from entering the space between the wall and the coating, must be carefully sealed with glue.
Disadvantages can be avoided if you choose a high-quality laminate with good characteristics and carry out competent installation.
to contents ↑Laminate Composition
It is imperative that before making a decision to use this or that material in wall decoration, you need to familiarize yourself with its composition, make sure there are no harmful components in it. Laminate board has several layers:
- The main layer is wood fiber. They give the board strength and are the basis for all subsequent layers.
- The layers of cellulose, thanks to a special impregnation, form a layer that protects the board from moisture.
- The next layer is decorative. Its role is imitation of various structures for aesthetics. The decorative qualities of a laminate generally depend on this layer.
- The protective layer is the last on the board. It is transparent and formed from acrylic resin mixed with special additives.
How to use laminate instead of an apron in the kitchen?
The main criteria for choosing a laminate board for laying on a kitchen wall are the following:
- The wear resistance class must be at least 31. This condition is simply necessary, because during operation the laminate will be subjected to various kinds of influences.
- The environmental safety class must be E1. Taking material with a different label is dangerous, because it may contain formaldehydes that adversely affect human health and the environment.
- As mentioned above, the laminate must be moisture resistant. It will cost more, but the expenses for it are quite justified, and the apron area is usually small, so there will be no significant monetary losses.
DIY apron for a kitchen from a laminate
Installation of a kitchen apron from a laminate with your own hands can be done in two ways - on the crate and by the glue method. Regardless of the option on which you stopped, first you need to prepare the surface and the necessary tools.
Equipment for laying a laminate apron:
- Hand saw or jigsaw.
- Hammer.
- Ruler and pencil.
- Building level.
- Electric drill.
- Wooden block.
- Reiki from a tree for a lathing or in case of use of an adhesive method - silicone.
- Self-tapping screws, nails.
Preparatory work:
- It is impossible to use the laminate immediately after it gets into the house, you need to give it time to get used to the conditions of the apartment.
Important! The optimal time for holding the material in the room where it will be laid is 48 hours. Such a technique will allow the material to accumulate the correct humidity and temperature, thus minimizing the risk of deformation of the board after its installation.
- While the laminate board is laying down, you need to tidy up the wall where the apron will be. You should remove all furniture from the wall, remove the old finish from it and clean it from dust. Next, you need to level the area using putty.
Important! The evenness of the wall is a prerequisite for the successful installation of the laminate. Unconditionally, you need to check it with the help of a building level.
Laying an apron in the kitchen from a laminate with your own hands on the crate
The advantages of this method are the lack of the need to carefully align the wall and seal all defects and cracks on it. It is only important to maintain the level of the crate during the installation of the bars, which will provide good conditions for attaching laminate sheets.
Here are some tips to keep in mind:
- It is convenient to create a crate from wooden blocks. They are attached with dowels directly to the wall.
- The location of the crate should be perpendicular to the orientation of the paintings.
- There should be a distance of 30 cm between adjacent slats.
- After the crate is successfully installed, you can proceed to fixing the laminate panels. A support block bolted to the lower edge of the apron will help to set the level. For these purposes, a profile for drywall is quite suitable.
- A laminate is mounted to the bars with the help of small nails. Nails are hammered in the place of the castle ledge.
- The panels are attached to each other using a native locking mechanism or special glue.
Important! This installation method is not very convenient, as some useful kitchen space is stolen. It should be noted in advance that the crate will take at least 3-4 cm.
Installation of a laminate board on a wall without lathing
In this case, the laminate board will be attached directly to the wall, so it is necessary to observe the main condition - the perfect evenness of the walls.
Important! Permissible level difference is not more than 3 mm. The necessary evenness can be easily achieved if the walls are upholstered with drywall.
Silicone is used to fasten the panels, not “liquid nails”. Although the properties of these two substances are similar, the silicone structure is more fluid, due to which the laminate board is pressed as close to the wall as possible, while the appearance of bumps and bumps is eliminated.
Installation Algorithm:
- Similarly, with the previous method, you need to set the stop. In its quality, you can use a drywall profile or a wooden bar.
- The adhesive should be applied to the back of the laminate board.
- Press the panel firmly against the wall and fix it for a short time, allowing the composition to “grab”.
All other elements of the apron are mounted in the same way.
Important points for installing a laminate board on a wall:
- Glue should be applied to the end of the strips.
- If cracks have formed after drying, it is necessary to coat them with glue.
- After the first row is laid, it is necessary to wait 2-3 hours so that the adhesive composition dries. Thus, the row will become a reliable support for subsequent rows.
Stock footage
A kitchen apron made of laminate is gaining more and more popularity every day. The ability to choose any texture and imitation of natural material allows you to implement original design ideas, and the practicality of the paintings adds confidence in the correct choice. If you also opted for this option of material for the design of a kitchen apron, then the information from the article will be useful to you, because it is very important to choose the right material and make a competent installation. This is the only way to achieve the desired result.
- How to choose a vacuum cleaner taking into account the characteristics of the house and coatings?
- What to look for when choosing a water delivery
- How to quickly create comfort at home - tips for housewives
- How to choose the perfect TV - useful tips
- What to look for when choosing blinds
- What should be running shoes?
- What useful things can you buy in a hardware store
- Iphone 11 pro max review
- Than iPhone is better than Android smartphones
 (No ratings yet)