

Recommendations on how to sew and assemble the sides in the crib
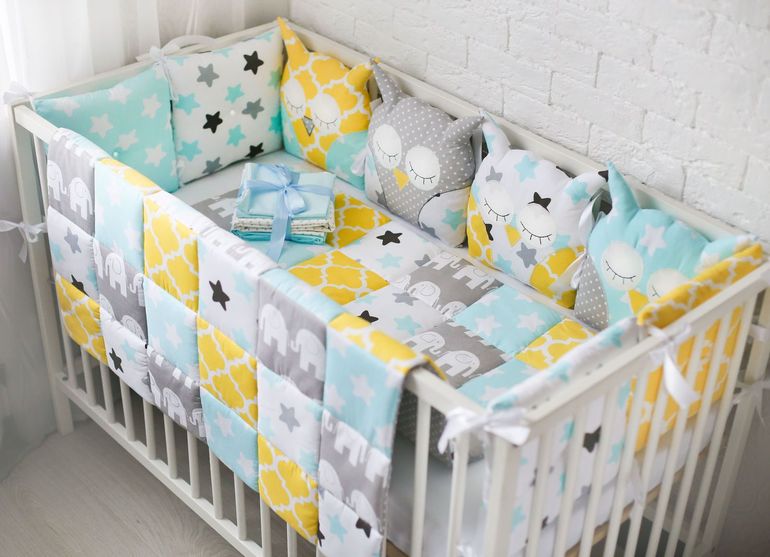
Sides are soft, flat products that are located around the perimeter of the crib to protect the baby from shock. This item not only protects the baby from cold drafts, but also protects him from contact with the hard rods of the bed. Such protection is intended for newborns, one-year-olds and children under the age of 3 years. Those who want to save money or try their hand at sewing can do the defense on their own by figuring out how to assemble the bumpers into a crib.
Why bumpers matter
Whether to use protective bumpers for cribs for newborns is debated every day from the moment they occur. The need to protect children in bed should be determined by the father and mother of the child: all babies are different.
There are calm children who do not move in a dream and do not wake up from contact with the hard rods of a wood bed. Such a child absolutely does not need bumpers, including when he gets up.
Other babies are functional at an early age, as a result of this, parents decide to purchase or arrange a side in the crib with their own hands to tie it, protecting the child from injuries, and guarantee peace of mind.
You should not consider the sides for the newborn's bed as a panacea for injuries or an impeccable protector of the baby. The care of adults should always be shown taking into account the degree of energy of the child.
Among the undeniable advantages of protective bumpers:
- Prevention of injury to the child from contact with the solid parts of the bed during wakefulness and sleep.
- Support and avoid getting children’s hands or feet between the lattices of the crib.
- Protect your child from drafts when ventilating or from cool air in winter.
- Sun protection in case the bed is located near the window.
- Creating a comfortable atmosphere for growth and development.
- Decorating the room and maintaining a single stylistic direction.
Toddler age for skirting
It is possible to use this desired device from birth to the stage when the child begins to try to get out of bed. If the mother found that the baby began to crawl, trying to get out of bed, the bumpers should be removed immediately. It is necessary that the child does not use them as a support, which, undoubtedly, will help to get out. The baby with the protective cover has the ability to sleep peacefully and not touch the bars, but still there may be a small bruise due to the fact that he climbed over the edge of the bed.
Determine the age of the child, when the protective sides in the bed are no longer needed, adults can independently, depending on the developing skills of the child and his abilities.
Sizing and styling
The size of infant beds is typical: width - 60, height - 55, length - 120 cm. To sew the sides for a standard bed, you need about 3.6 meters of fabric. If the bumpers are sewn with covers, the lining fabric is needed in the same amount.
When there is doubt about your own abilities, it is better to purchase a larger piece of fabric with a spare volume for cutting, so that it is possible to correct mistakes, deciding how to make the sides in the crib. And for decoration, you may need auxiliary fabrics, even decorative details in the form of pompons and braids, it is possible to sew pieces with images of animals, clouds, cartoon animals, dogs and use other ideas. A dragon and a terrible beast will not do.
When making fens-bumpers in a children's bed with your own hands, you should worry about acquiring the necessary fabric and about how many bedding you need. A similar set with an illustration will look more interesting. The size of the usual option to arrange the sides in the crib:
- 2 pcs. 30 cm high and 60 cm wide.
- 2 things with a height of 30 cm and a width of 120 cm.
For beginners, it is preferable to stop at this form, since it is easiest to carry out and sew. This work does not take a lot of time. If the bed contains extraordinary dimensions and shape, you need to start with a measurement to sew a unique filling.
For example, in a round bed, 2 sets of sides with pinches are important, since over time they turn into an oval.
Protection Materials
The main criterion when choosing the sides in the crib and all the textiles that will touch the baby's skin is safety. To make the sides in the crib for a newborn, the fabric should only be natural and pass air well, do not take velor, the combination of colors looks great.
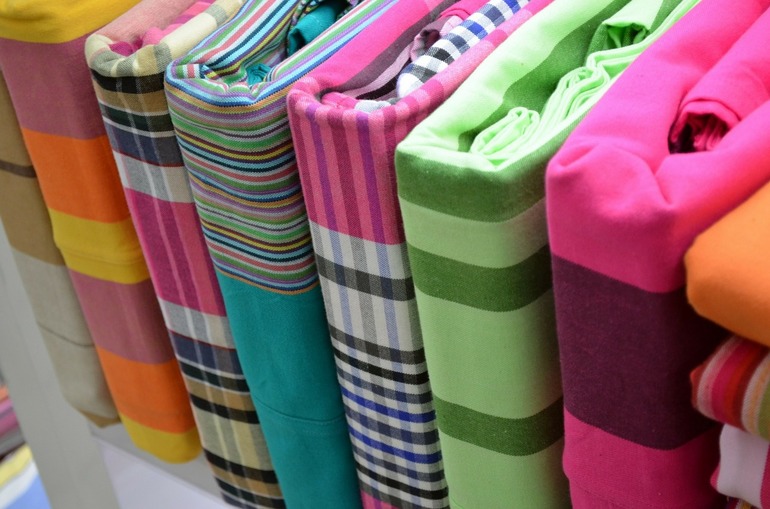
For the manufacture of sidewalls use:
- linen;
- cotton;
- calico;
- flannel;
- chintz.
Popular Fillers: Pros and Cons
A huge variety of fillers is presented on the market, you can choose those that are suitable for the baby.
For example, such fillers to stitch the product according to the instructions:
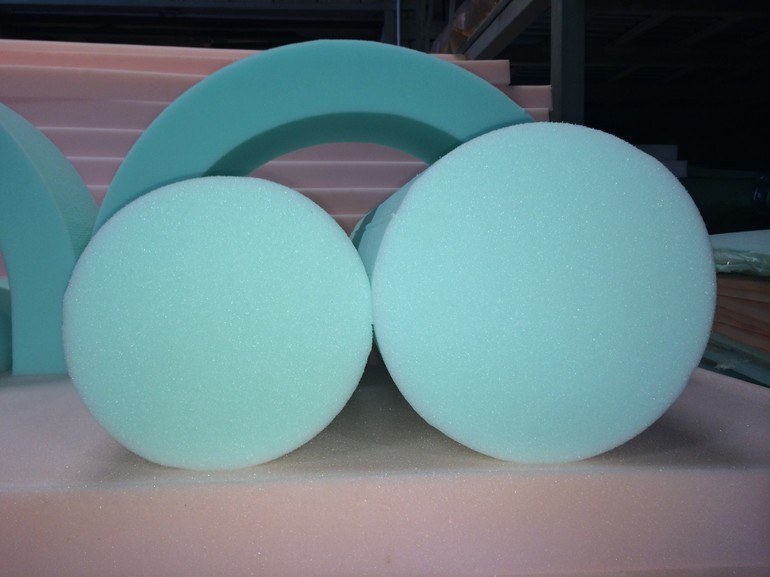
- Foam rubber. Wear resistant material, but retains moisture.
- Synthetic winterizer. It is easily erased, dries quickly, does not change shape, but rolls down if it is not stitched with stitches.
- Holofiber. Hypoallergenic, easy to clean, not afraid of moisture, no deformation, but need to be quilted so that it does not slip.
- Halcon. Wear-resistant material, elastic, retains heat, but can be allergenic.
- Periotek. Hypoallergenic, elastic, does not allow the reproduction of ticks and microorganisms, but does not allow air to pass through.
- Polyester. Wear-resistant, does not retain moisture, hypoallergenic, poorly breathable.
Varieties of covers
Before approving the decision about which bumpers to sew with your own hands for an infant bed, you should understand the key characteristics for any type of these products and the features of tailoring.
Sew the sides in the bed for the newborn and fix them easily There are such options:
- Bumpers with removable edges 120x60. They consist of continuous pillows with covers made of natural material. Made in the form of pillowcases and fastened with a zipper. The advantage is that you can make two sets of external covers and wash them if necessary. For sewing, additional fabrics, cotton and 4 zippers with a length of at least 42 cm will be required, which will lead to costs. Removable covers sew up a couple of centimeters more gaskets to make them convenient to remove. You can not use lightning, as they have small parts that are dangerous for the baby if they come off.
- Side covers with pillows. Convenient because you can use more filler. In cases with small pillows 40-50 cm in size, the thickness of the sides on the pattern can be increased. Thus, the bed will be as warm and comfortable as possible. Ready-made foam pads are simply attached to the grilles using a snake.
- High bumpers in different colors. Cover the wooden rods of the crib from the tree completely. They protect the baby from drafts and bumps. But the child is limited to viewing his bed from the inside, which can affect the level of his mental development.
- Bumpers with pockets. If you need to make a fence with pockets, it is imperative that they are carried out on the outside of the bed. Internal placement, if filled with something, always seduces the child. He will try to extract and examine their contents.
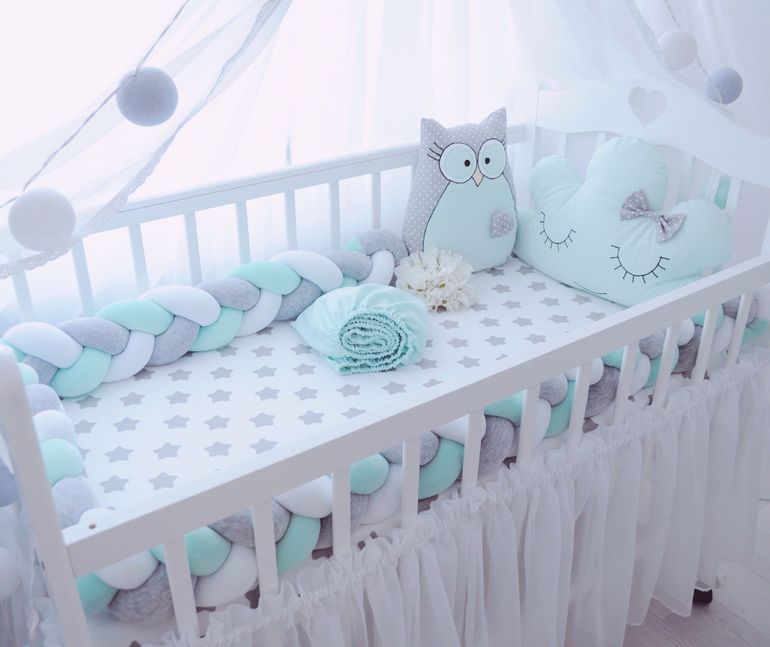
- Rolled oval rollers with pigtails. They can be made, sheathed and installed in the same way as others. This variation is used much less often because it does not protect the child’s head from bumps and falls. But in conditions of high temperature in the room where the child is, this type of bumper allows fresh cool air to pass through. Therefore, the option in the form of rollers is good and suitable for newborns who do not yet know how to move or crawl.
Features of the choice of options
So that the sides cover the entire space of the bars, and not half, you need to take measurements along the entire height of the crib. And cut the fabric according to these measurements. Such bumpers will protect the child from blows, even when he learns to crawl. But it is worth keeping in mind that the high sides block the entire review. This is perhaps their only drawback.
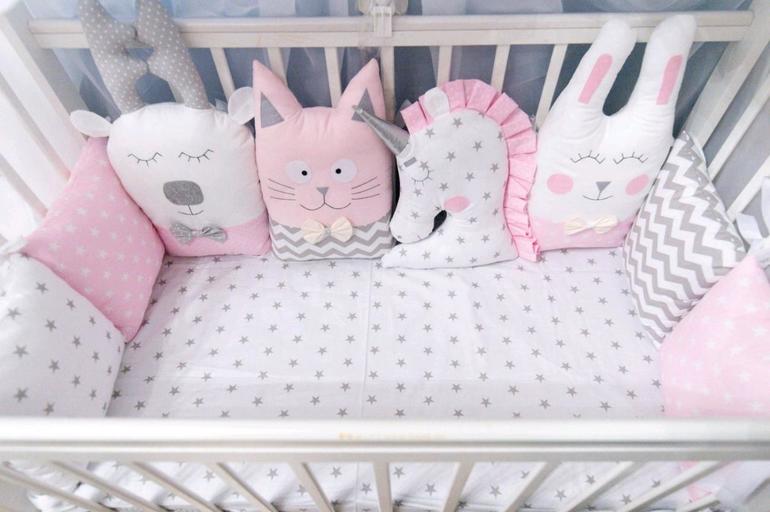
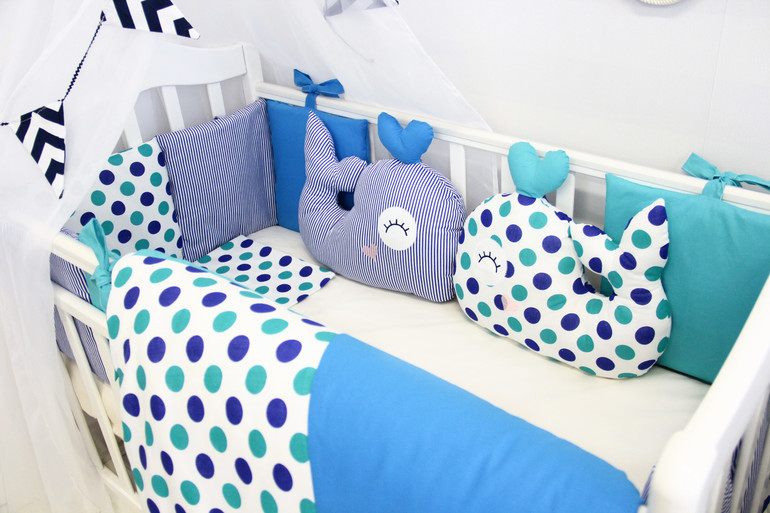
For very young children and newborns, low bumpers with little animals in bed are suitable. After all, they will not interfere with the baby looking in different directions. Such sides are sewn in the form of pillows and mattresses. Patterns and patterns that can be downloaded for free show how to sew them.
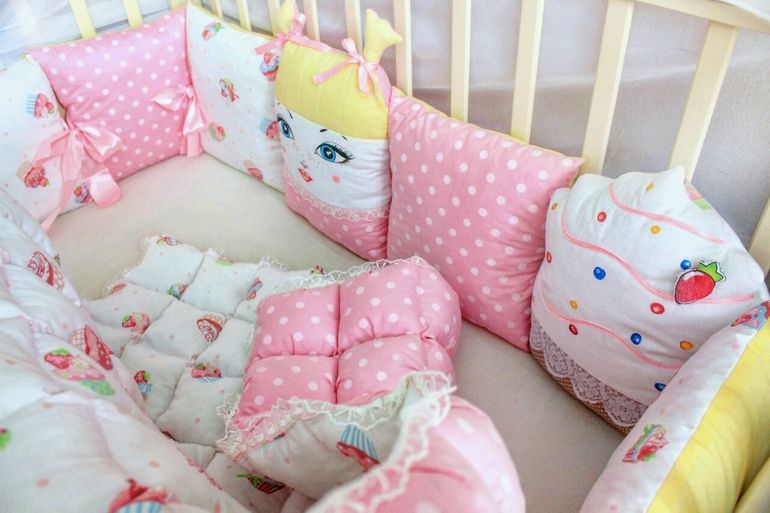
From an early age, the child tries to know the world. He is interested in everything. Therefore, objects, drawings, figures, which he will see around, will shape his development. Already under the age of one year, developing toys, including bumpers with images, will help train memory and thinking.
Protection with fastening, made with fasteners in the form of locks or Velcro, can break during the period when the child tries to rise and pull over the edge. The material of the knitted bumper bomber is also very significant.
Artificial tissues can irritate the skin, causing allergic or inflammatory reactions.
Therefore, it is better to give preference to natural fabrics and reliable fasteners for sidewalls. This will enable things to hold well, wash, dry quickly, without losing their own shape.
Workshop on manufacturing
It is necessary to prepare the fabric and filler for the shockproof girl or boy. Templates for calculation must be made in advance. Patterns are carefully transferred to the fabric. You must not forget to leave 1-1.5 cm of seam allowance. If the bumpers are sewn with covers, then you need to cut two sets of fabric - for them and the lining.
Here is the master class step by step:
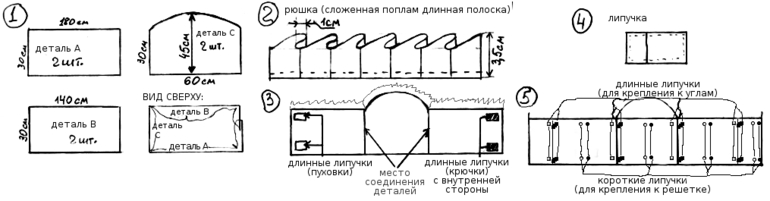
- The filler in the form of a roll of synthetic winterizer or foam rubber is cut in the same way, but the size of the model should be reduced by 1.5−2 cm, depending on the thickness, so that it fits into the coating. If the sides are sewn correctly in the form of pillows, the filler is filled just like that, nothing needs to be cut.
- The lining fabric is folded face down and the cover is stitched around the perimeter.
- Then you need to leave a hole to put the filler inside. After that, it is inserted.
- The hole must be carefully stitched. It’s better to do it manually with a hidden seam. A similar procedure is performed for each side. Stitches can be sewn in two ways.
Bumpers can be fastened with a simple tie and Velcro. As a tie, you can use ready-made ribbons. They can also be sewn from fabric for bedding. The size and number of lines are randomly selected. As a rule, at least 4 are required on the short sides of the head and near the legs, 6 on the long side for the side walls of the bed.
For better fixing of the bumper, more screeds can be made. A great option - from satin ribbons, like bralette. The length of the fastener is selected regardless of the size of the product, but it is better to make the tape longer - so the protection will be easier to knit, and it looks more beautiful even in brown or yellow colors.
If it is difficult to make and fix the original protection with your own hands for various reasons, then instead you can buy finished products in shopping centers where there are strollers and other baby products. There are options that cover the bed at 2/3 or 1/3, and also have different pictures. Such products have an absolute advantage - they do not limit the view of the baby and allow him to follow what is happening around.
- How to choose a vacuum cleaner taking into account the characteristics of the house and coatings?
- What to look for when choosing a water delivery
- How to quickly create comfort at home - tips for housewives
- How to choose the perfect TV - useful tips
- What to look for when choosing blinds
- What should be running shoes?
- What useful things can you buy in a hardware store
- Iphone 11 pro max review
- Than iPhone is better than Android smartphones
 (No ratings yet)