

How to clean your headphones from sulfur and dirt
From the very beginning of their appearance, for many, headphones have become one of the most important parts of everyday life. They tirelessly accompany people, allowing them to listen to their favorite music, audio books and podcasts, regardless of the situation. Therefore, you need to know how to clean your headphones from sulfur and other contaminants.

The Importance of Cleaning
Regardless of the frequency of use, people usually want all things to remain in excellent condition, including headphones. Many are ready to pay a lot of money for a high-quality device from companies like Audio-Technica, Sennheiser, Sony and so on. Despite the fact that expensive models are more likely to not break on their own after a few months, they will not be able to avoid other problems.
Thus, it can be extremely unpleasant to find that for some time the sound quality decreases, and your favorite tunes are not so clearly audible. To do this, it is not necessary to be an “audiophile” - even the most illegible ears can notice this difference, especially if you have to turn up the volume to the maximum to distinguish at least something.
Some immediately begin to search for a new pair of headphones. But what if, in fact, there is a simple and cheap way to rectify the situation? After all, the reason for the bad sound can only be because the headphones themselves have become dirty.
To check whether this is so, you need to inspect the inside of the ear pads and the wire mesh. Very often there you can find earwax, grease and dust, which for months have stuck to the device and clogged even in its smallest crevices. However, the deterioration of sound - this is not so bad.
People almost always throw headphones into bags and pockets where accessories continue to mix with other dust and dirt lying there from time immemorial. Then the headphones are taken out, untangled, and inserted back into the ears, and this is a sure way to increase the chances of getting an infection, a sulfur plug and going to the otolaryngologist. The fact that the device itself does not enter the ear canal does not mean safety. Dirt can easily peel off the wire mesh and penetrate the ear.
A little headphone maintenance and care can go a long way. This ensures ear hygiene and maximum return on the money spent.
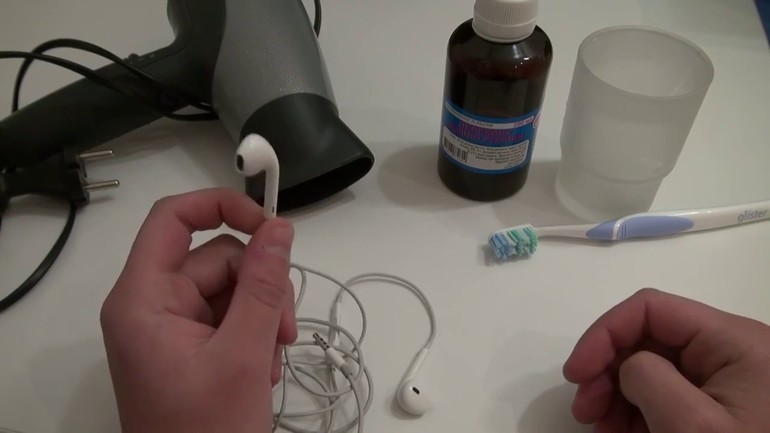
The right tools
All headphones can be divided into three types - plug-in (they are in-ear or droplets), in-ear or vacuum, inserted into the ear canal, and on-ear, which are worn on the ears. In any case, everything that is needed to disinfect and clean each type of device is likely to be found in any bathroom:
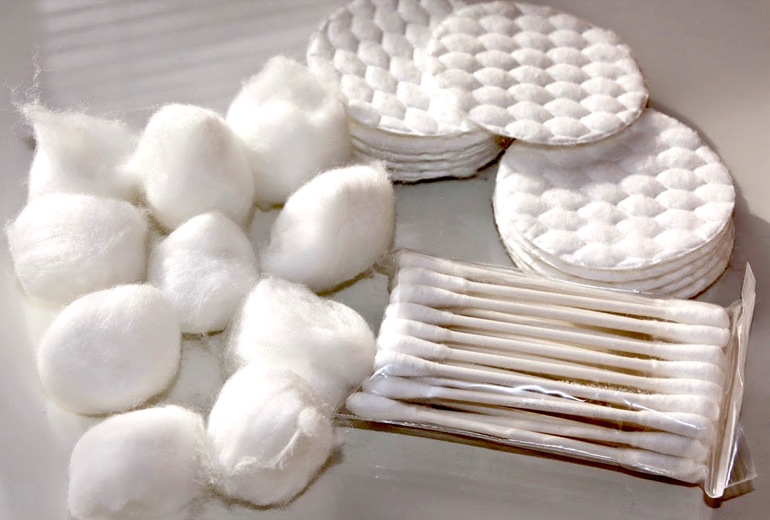
- A piece of cloth or cotton pads.
- Cotton swabs.
- Alcohol or other disinfectant.
- Hand soap.
- Toothbrush.
- A paper clip or a toothpick.
Despite the fact that cleaning does not need special tools, the process itself takes some time. Since headphones are a very fragile thing, you should be careful and have patience.
Dirt Removal Methods
In the case of the earbuds, you first need to carefully unwind the plastic driver pad (the so-called headphone itself). To get to the grid, turn the cover counterclockwise - Today, almost all models allow this.
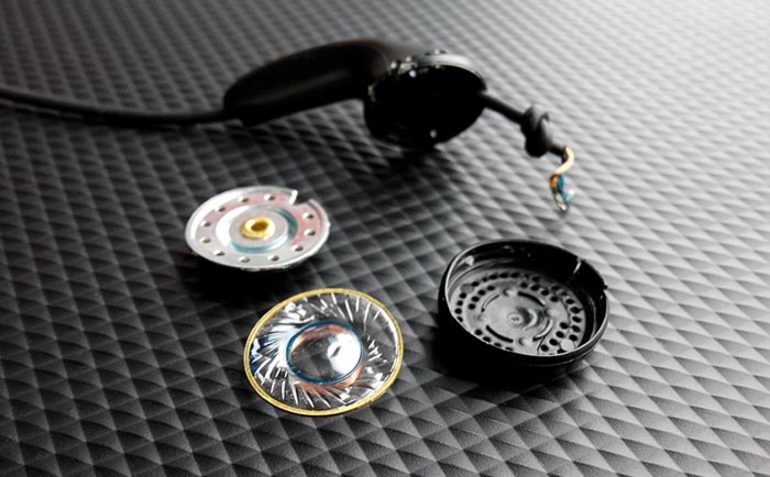
Now you need to pour alcohol or any disinfectant into a small container and place the nets with the pads there for a few minutes, then take a cotton pad and wipe the surface.If the mesh is glued, it can only be cleaned externally: remove large pieces of sulfur from the headphones with a toothpick, and then, directing the driver to the floor, wipe it with a toothbrush. It will be useful to gently wipe the wires and the case with alcohol. After that, you need to let all the parts dry - an hour will be enough.
Vacuum models are cleaned in a similar way. Silicone pads can be easily removed, after which they can be washed safely in soapy water.
However, it is not always possible to get direct access to the mesh, especially in the case of the popular Apple Earpods used for the iPhone (and similar types of headphones, for example, Samsung Galaxy Buds from Samsung), which today are the standard for wireless headsets. One way or another, to wash iPhone or any other similar model of headphones, you can resort to using hydrogen peroxide.
It must be poured into the container (the liquid should barely cover the bottom) and for ten minutes, fix the drivers in it with the net down, then dry. You can clean the headphones from sulfur without peroxide, using alcohol or any liquid that can dissolve pollution.
By the way, if the accessories are white, then alcohol can damage the paint when actively cleaning the case. To prevent this from happening, it is better to use a nail polish remover that does not contain acetone.
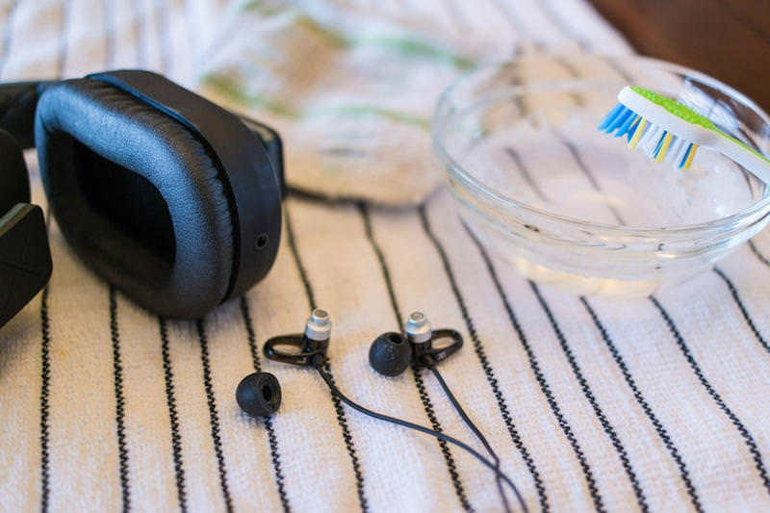
Cleaning the on-ear headphones is a bit more complicated as they include parts that are more vulnerable to damage (leather or foam ear pads), therefore, you need to proceed carefully:
- First, moisten the cloth or cotton pad with a warm and mild soapy solution, then draw along the outer parts of the linings, then wipe them dry.
- With a cotton swab moistened with alcohol or peroxide, walk along the cracks and inaccessible areas of ear pads.
- The soft mesh must be disinfected in the same way.
The headphones are now clean and safe to use. However, those who are not looking for easy ways can use a device for cleaning hearing aids. These small vacuum pumps extremely efficiently remove earwax and dirt without damaging parts.
White accessories may turn yellow over time, as some types of plastic are exposed to ultraviolet radiation. This does not have negative consequences for the performance of the headphones, but it does not look too aesthetically pleasing. To bleach the device, you can apply a thin layer of hydrogen peroxide on the driver housing and the wire, then cover with transparent plastic and hold it in bright sunlight for two to three hours.
Another method is to use automotive varnish containing fine abrasive powder. The polish is able to return the accessory to its original color, however, you need to pay attention to the type of product - it should not be matte. In addition, such a varnish is likely to erase all stickers and inscriptions from the surface.
The headphone jack and plug also tend to clog. If the latter can simply be wiped with a rag, then the connector must be handled more carefully - do not allow contact with the liquid and put toothpicks in there. Correctly clean the inlet using a can of compressed air that can blow out all the dirt from the hole.
Preventive measures
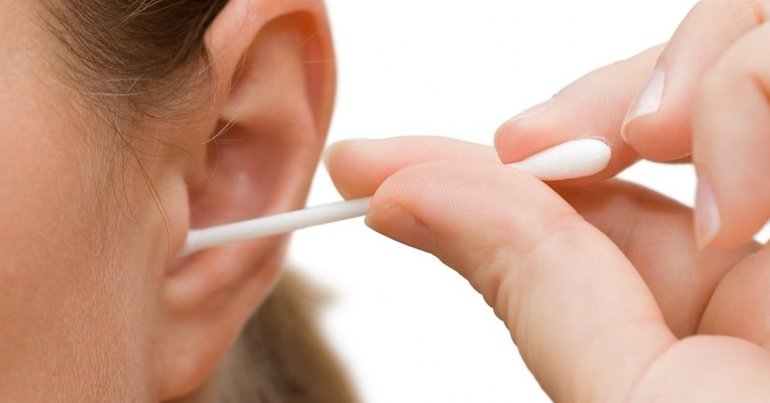
Clean headphones start with clean ears. Lack of dirt in the organs of hearing and their regular cleaning significantly reduce the amount of debris entering the device. It is important to remember that cotton buds can squeeze sulfur into the ear canal, causing it to become clogged, infections, and hearing problems. It is best to make preventive visits to the doctor, however there are a few things that you can do on your own.
For example, dry your ears thoroughly after a shower. Water inside the auditory canal does not affect its condition in the best way, creating an ideal environment for bacteria. Wearing headphones in wet ears can lead to unpleasant odors from ear pads.
Can also use mineral oil and weak hydrogen peroxideto wash accumulated earwax. To do this, tilt your head and drip a few drops into your ear, then wait about 30 seconds and drain the liquid.
- How to choose a vacuum cleaner taking into account the characteristics of the house and coatings?
- What to look for when choosing a water delivery
- How to quickly create comfort at home - tips for housewives
- How to choose the perfect TV - useful tips
- What to look for when choosing blinds
- What should be running shoes?
- What useful things can you buy in a hardware store
- Iphone 11 pro max review
- Than iPhone is better than Android smartphones
 (No ratings yet)